Introduction In this Laravel 10 tutorial, we will explore how to implement an Ajax-based date range filtering feature using Yajra DataTabl...
Introduction
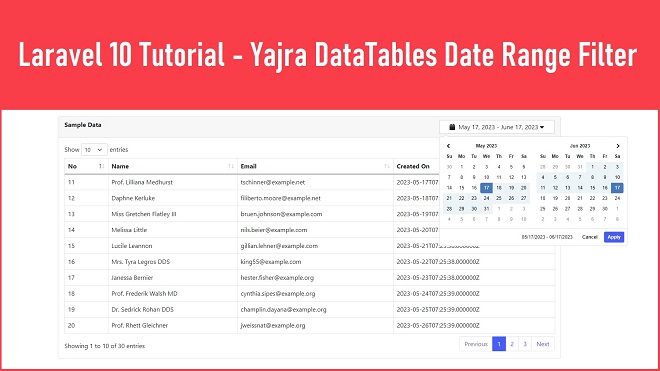
In this Laravel 10 tutorial, we will explore how to implement an Ajax-based date range filtering feature using Yajra DataTables. Yajra DataTables is a powerful jQuery plugin that simplifies working with dynamic, interactive tables in Laravel applications. By combining it with Ajax and date range filtering, we can create a responsive and user-friendly data filtering mechanism.

Below you can find step by step guide for implementing Ajax Date Range Filter in Laravel 10 Yajra DataTables.
- Download Laravel
- Install Yajra Datatable
- Make MySQL Database Connection
- Insert Sample Users Data
- Create Controller
- Create Views Blade File
- Set Route
- Run Laravel App
1 - Download Laravel
Before we begin, make sure you have Laravel 10 installed on your local or remote development environment. If you haven't installed it yet, so for install Laravel 10 framework, we have goes into directory where we want to download Laravel 10 Application and after this goes into terminal and run following command.
composer create-project laravel/laravel date_range_filter
This command will create date_range_filter and under this directory it will download Laravel 10 Application. And after this we have go navigate to this directory by run following command.
cd date_range_filter
2 - Install Yajra Datatable
To use Yajra DataTables in your Laravel project, you need to install the package. Open your terminal and navigate to your project's directory. Then, run the following command:
composer require yajra/laravel-datatables-oracle
This will install the Yajra DataTables package and its dependencies.
3 - Make MySQL Database Connection
Next we have to connect Laravel Application with MySQL database. So for this we have to open .env file and define following MySQL configuration for make MySQL database connection.
DB_CONNECTION=mysql
DB_HOST=127.0.0.1
DB_PORT=3306
DB_DATABASE=testing
DB_USERNAME=root
DB_PASSWORD=
So this command will make MySQL database with Laravel application. Next we have to make users table in MySQL database. So we have goes to terminal and run following command:
php artisan migrate
So this command will make necessary table in MySQL database with also create users table also.
4 - Insert Sample Users Data
For demonstration purposes, let's add some sample users data into users table. So we have goes to terminal and run following command:
php artisan tinker
This command will enable for write PHP code under terminal and for insert sample data in users table we have to write following code in terminal which will insert 40 users data into users table.
User::factory()->count(40)->create()
5 - Create Controller
Now, let's create a controller that will handle the data retrieval and filtering logic. In your terminal, run the following command to generate a new controller:
php artisan make:controller UserController
Open the app/Http/Controllers/UserController.php file and replace the index() method with the following code:
app/Http/Controllers/UserController.php
<?php

namespace App\Http\Controllers;

use Illuminate\Http\Request;

use App\Models\User;

use DataTables;

class UserController extends Controller
{
    public function index(Request $request)
    {
        if($request->ajax())
        {
            $data = User::select('*');

            if($request->filled('from_date') && $request->filled('to_date'))
            {
                $data = $data->whereBetween('created_at', [$request->from_date, $request->to_date]);
            }

            return DataTables::of($data)->addIndexColumn()->make(true);
        }
        return view('users');
    }
}
Save the changes and make sure to import the necessary namespaces at the top of the file.
6 - Create Views Blade File
We now need to create a view file that will display the DataTables table and the date range filter inputs. Create a new file called users.blade.php in the resources/views/ directory. Add the following code to the file:
<!DOCTYPE html>
<html>
<head>
<title>Laravel 10 Datatables Date Range Filter</title>
<meta name="csrf-token" content="{{ csrf_token() }}" />
<link href="https://cdnjs.cloudflare.com/ajax/libs/twitter-bootstrap/5.0.1/css/bootstrap.min.css" rel="stylesheet">
<link href="https://cdn.datatables.net/1.11.4/css/dataTables.bootstrap5.min.css" rel="stylesheet">
<script src="https://code.jquery.com/jquery-3.5.1.js"></script>
<script src="https://cdnjs.cloudflare.com/ajax/libs/jquery-validate/1.19.0/jquery.validate.js"></script>
<script src="https://cdn.datatables.net/1.11.4/js/jquery.dataTables.min.js"></script>
<script src="https://cdn.jsdelivr.net/npm/bootstrap@5.0.2/dist/js/bootstrap.bundle.min.js" integrity="sha384-MrcW6ZMFYlzcLA8Nl+NtUVF0sA7MsXsP1UyJoMp4YLEuNSfAP+JcXn/tWtIaxVXM" crossorigin="anonymous"></script>
<script src="https://cdn.datatables.net/1.11.4/js/dataTables.bootstrap5.min.js"></script>
<script src="https://use.fontawesome.com/releases/v6.1.0/js/all.js" crossorigin="anonymous"></script>
<script type="text/javascript" src="https://cdn.jsdelivr.net/momentjs/latest/moment.min.js"></script>
<script type="text/javascript" src="https://cdn.jsdelivr.net/npm/daterangepicker/daterangepicker.min.js"></script>
<link rel="stylesheet" type="text/css" href="https://cdn.jsdelivr.net/npm/daterangepicker/daterangepicker.css" />
</head>
<body>
<div class="container">
<h1 class="text-center text-success mt-5 mb-5"><b>Laravel 10 Datatables Date Range Filter</b></h1>
<div class="card">
<div class="card-header">
<div class="row">
<div class="col col-9"><b>Sample Data</b></div>
<div class="col col-3">
<div id="daterange" class="float-end" style="background: #fff; cursor: pointer; padding: 5px 10px; border: 1px solid #ccc; width: 100%; text-align:center">
<i class="fa fa-calendar"></i>
<span></span>
<i class="fa fa-caret-down"></i>
</div>
</div>
</div>
</div>
<div class="card-body">
<table class="table table-bordered" id="daterange_table">
<thead>
<tr>
<th>No</th>
<th>Name</th>
<th>Email</th>
<th>Created On</th>
</tr>
</thead>
<tbody>
</tbody>
</table>
</div>
</div>
</div>
</body>
<script type="text/javascript">
$(function () {
var start_date = moment().subtract(1, 'M');
var end_date = moment();
$('#daterange span').html(start_date.format('MMMM D, YYYY') + ' - ' + end_date.format('MMMM D, YYYY'));
$('#daterange').daterangepicker({
startDate : start_date,
endDate : end_date
}, function(start_date, end_date){
$('#daterange span').html(start_date.format('MMMM D, YYYY') + ' - ' + end_date.format('MMMM D, YYYY'));
table.draw();
});
var table = $('#daterange_table').DataTable({
processing : true,
serverSide : true,
ajax : {
url : "{{ route('users.index') }}",
data : function(data){
data.from_date = $('#daterange').data('daterangepicker').startDate.format('YYYY-MM-DD');
data.to_date = $('#daterange').data('daterangepicker').endDate.format('YYYY-MM-DD');
}
},
columns : [
{data : 'id', name : 'id'},
{data : 'name', name : 'name'},
{data : 'email', name : 'email'},
{data : 'created_at', name : 'created_at'}
]
});
});
</script>
</html>
Make sure to include the necessary JavaScript and CSS files for DataTables and the date range picker.
7 - Set Route
Next, we need to define a route that will handle the Ajax requests for filtering. Open the routes/web.php file and add the following code:
<?php

use Illuminate\Support\Facades\Route;

use App\Http\Controllers\UserController;

/*
|--------------------------------------------------------------------------
| Web Routes
|--------------------------------------------------------------------------
|
| Here is where you can register web routes for your application. These
| routes are loaded by the RouteServiceProvider and all of them will
| be assigned to the "web" middleware group. Make something great!
|
*/

Route::get('/', function () {
    return view('welcome');
});


Route::get('users', [UserController::class, 'index'])->name('users.index');
8 - Run Laravel App
Finally, run your Laravel application by executing the following command in your terminal:
php artisan serve
Visit the URL provided, which is usually http://localhost:8000/users, to see the application in action. You should see a table of users along with a date range input. Selecting a date range will dynamically filter the users based on the chosen range.
Congratulations! You have successfully implemented an Ajax-based date range filtering feature with Yajra DataTables in Laravel 10.
Remember to customize the styling and further enhance the functionality as per your project's requirements.
Please note that you may need to install the required JavaScript libraries and CSS frameworks mentioned in the article before using them in your application.
I hope this comprehensive guide helps you. If you have any further questions, feel free to ask!


COMMENTS